Posted by
Indra Kurniawan
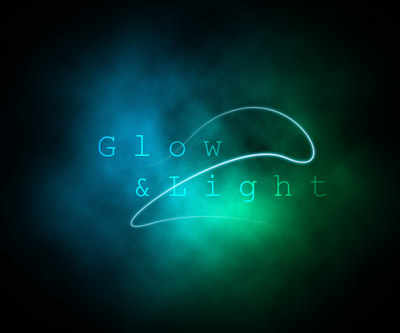
In this Photoshop effect tutorial I cover the creation of several different light and glow effects in Photoshop. In this tutorial we are going to recreate picture 1. The effects inpicture 1 consist of smoke, light trails, sparkles, stars and bokeh effects. Luckily it's pretty simple to create each of these effects in Photoshop.
Smoke Effect in Photoshop

Picture 2. Overlay blending mode.

Picture 3. Colorful smoke effect in Photoshop.
Let's start with the smoke effect in the background. The smoke effect is created by rendering clouds and coloring them with an overlay layer:
- Create a new image document (600x500px).
- Fill the background with black color (Edit > Fill...)
- Create a new empty layer (Layer > New > Layer...) and select it.
- Use Elliptical Marquee Tool and make the following selection to the center of the image: Width: 350px Height: 250px Feather: 80px
(you can set these values in the options-panel in the top of the screen when the Elliptical Marquee Tool is selected.)
- Select black as foreground color and white as background color. Create clouds into the selection (Filter > Render > Clouds). (Clouds are rendered randomly. If you are not satisfied with the clouds you can just click undo and render them again.)
- Create a new empty layer on top of the clouds layer and select it. Change the blending mode of the layer to Overlay like in picture 2.
- Select #06c2ff as foreground color and #00ff7d as background color. Use Gradient Tool and fill the new layer with gradient. The result should be similar to picture 3.
Overlay Text

Picture 4. Overlay text.
Next we'll create some text on top of the smoke. Use Type Tool to create some text. Change the Blending mode of the text layer to Overlay. Now your image should look similar to picture 4.
Light Trail Effect in Photoshop
Picture 5. Brush stroke along path produces a light motion trail.
Next we'll create light motion trails with the help of a Pen Tool. The Pen Tool can be tricky if you don't have previous experience with it. You'll probably need the following tools found from the Pen Tool flyout button:
 Pen Tool
 - Use this tool to draw the curve in the first place. You can click and drag to create curves on the fly. Don't worry if the curve is not perfect, you can modify it later.
 Add Anchor Point Tool
 - Use this tool if you want to add an anchor point to an existing curve
 Remove Anchor Point Tool
 - Use this tool if you want to remove an anchor point from an existing curve
 Convert Point Tool
 - Use this tool to convert and move anchor points and to control their handles:
- Click on any smooth point to convert it to a corner point.
- Click and drag on any corner point to convert it to a smooth point.
- By pressing CTRL in keyboard you can move anchor points.
- Click on the curve to control handles associated with the clicked segment
- When you are comfortable with the Pen Tool, draw some smooth curve for example like in picture 5. At this point it is just a path. Next we are going to create a light trail out of it.
- Create a new empty layer on top of the text layer and select it.
- Select Brush Tool. Right-click anywhere on the image and set Master Diameter to 3px and Hardness to 100%. Select white as foreground color.
- Select Pen Tool and right-click anywhere on the image and select Stroke Path... from the menu. Make sure that Simulate Pressure is checked and click Ok. Now there is a brush stroke along the path. Let's hide the path.
- Hide the path by unselecting it:
- Open Paths window (Window > Paths)
- Click on Paths window below the path to unselect it.
- Let's add some glow to the stroke. Right-click on the layer and select Blending Options... from the menu. TurnOuter Glow on and change the color to #16b5e5. Now your image should look similar to picture 5.
Sparkle Effect Adobe Photoshop

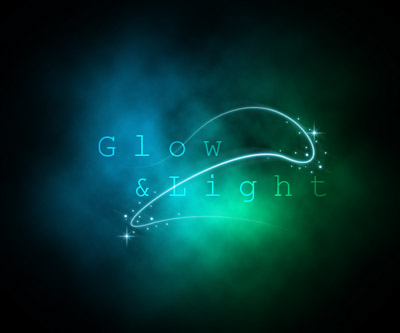
Picture 6. Glowing sparkles along the light trail.
Next we are going to add some sparkles along the trail. This is very easy to do. Just select the light trail layer and use Brush Tool to create small dots to it. Use Brush sizes of 1-4px. Now the image should look similar to picture 6.
Motion Blurred Glow Effect

Picture 7. Subtle motion blur effect is added.
Let's add some motion blur to the light trail:
- Right-click on the light trail layer and select Duplicate Layer... from the menu and click Ok.
- Now there are two similar layers and the trail appears brighter. Select the lower layer (original) and add motion blur to it (Filter > Blur > Motion Blur...) with the following settings:
Angle: -30
Distance: 40
- Change the Opacity of the motion blurred layer to 40%. The effect is pretty subtle but in my opinion creates nice sense of motion to the image. Now the image should look like in picture 7.
Star Effect in Photoshop
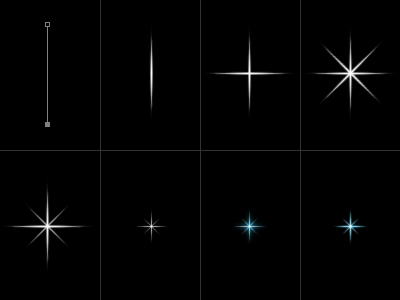
Picture 8. The process of creating a star in Photoshop.
Picture 9. Star effects applied to the image.
The next of the Photoshop effects we're going to create is stars. First we are going to create a simple star and then apply some layer effects to it. The following process is illustrated in picture 8.
- Create a new layer and select it.
- Set foreground color to pure white.
- Set the Brush size to 3px and Brush hardness to 100%.
- Use the Pen Tool and draw 100 pixels high vertical path. (Use info window to see pixel coordinates while drawing)
- With Pen Tool still selected right-click anywhere on the image and selectStroke Path... from the menu. Make sure that Simulate Pressure is checked and click Ok. Now there is a brush stroke along the path. Hide the path.
- Make duplicate of the star layer (right-click on the layer and select Duplicate Layer... from the menu)
- Rotate the new star layer 90 degrees (Edit > Transform > Rotate).
- Merge the two layers into one (right-click on upper layer and select Merge Down from the menu).
- Make duplicate of the star layer.
- Rotate the new layer 45 degrees.
- Scale the new layer down to 70% (Edit > Transform > Scale).
- Change the Opacity of the new layer to 70%.
- Merge the two layers into one.
- Scale the star down to 40%.
- Copy the layer style from the light trail layer to the star layer (you can copy and paste styles by right-clicking on a layer). Modify Outer Glow by changing the Size parameter from 5 to 2. (Right-click on the layer and selectBlending Options... from the manu and go to the Outer Glow section)
- Now the star is ready. Make duplicate of the star layer and move stars to suitable locations. See picture 9.
Bokeh Effects in Photoshop

Picture 10. The final image with many different light and glow effects made in Photoshop. Click
here to see a large version.

Picture 11. Photoshop light and glow effects applied to a photo. Click
here to see a larger version.
The last thing to do in this Photoshop effect tutorial is to add some simple bokeh effects to the image:
- Create a new empty layer and select it.
- Use the Ellipse Tool to create a 50 pixels wide circle.
- Right-click on the layer, selectBlending Options... from the menu, and add the following layer effects:
Color Overlay: light gray (#cccccc)
Stroke: Size: 2px | Position: inside | Color: white
- Rasterize layer styles: Create a new empty layer below the bokeh layer. Right-click on Bokeh layer and selectMerge Down from the menu.
- Add 1 pixel Gaussian Blur to the layer (Filters > Blur > Gaussian Blur).
- Change the Blending mode of the layer to Overlay and Opacity to 14%.
- Create two copies of the layer and place the three bokeh circles as you wish. Picture 10 is the final image.


Post a Comment